


About
The overview of disk management will allow us to create multiple partitions to store data and make our work life easy. Firstly, we will understand some of the pros ( advantages ) of disk management for Windows. Secondly, we will find out the cons ( disadvantages ) of disk management on windows. Finally, following the tutorial on how we can create partition and mage our storage in a better way. Being an online blogger I have to always keep a track of my personal and work data. Disk management allows me to organize my work and personal data in proper order. It gets easy to back up files and less worrisome about losing any data or getting malware defects.
Also read:
Pros
- Easy to reinstall windows ( without losing personal files)
- Backup at ease
- Better security
- Well-organized data
- Access to work with multiple OS ( Operating system )
- Allows working with various file systems.
Cons
- Intricacy, or chance of errors
- Not recommended for the average user
- A false perception of security
- Chances of data loss disaster
Steps to Acces Disk Management
- Access it from the Quick Access Menu
Procedure – Right-click on the bottom-left corner Start or Windows button on the desktop to open the Quick Access Menu, and then choose Disk Management.
- Access from Run window
Procedure – Press Window and R button to open Run, type diskmgmt.msc in the empty box, and click enter or OK.
- Open it with from Search
Procedure – Type diskmgmt.msc in the search box and select disk management from the list
- Access from Disk Management in Computer Management
Procedure – Open windows file explore, Right Click on This PC option from the right and select Manage in the context menu to enter Computer Management. Click on storage from the dropdown menu and finally click on disk management.


Steps to Create Partition
Firstly, decide the number of partitions as per your requirement. Calculate the storage you need for each partition and follow the steps to get started. It is important that you follow each and every step cautiously to avoid errors while creating the partition. As per my requirements of the tutorial I have created three partitions with a storage capacity of 585GB each. Check the amount of inbuilt storage of your system before getting started.
- Shrink Volume
- Right-click on the OS (C) drive
- Select Shrink Volume
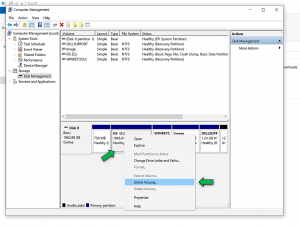
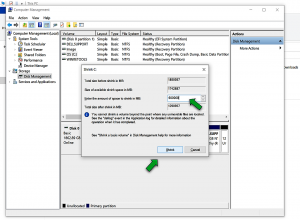
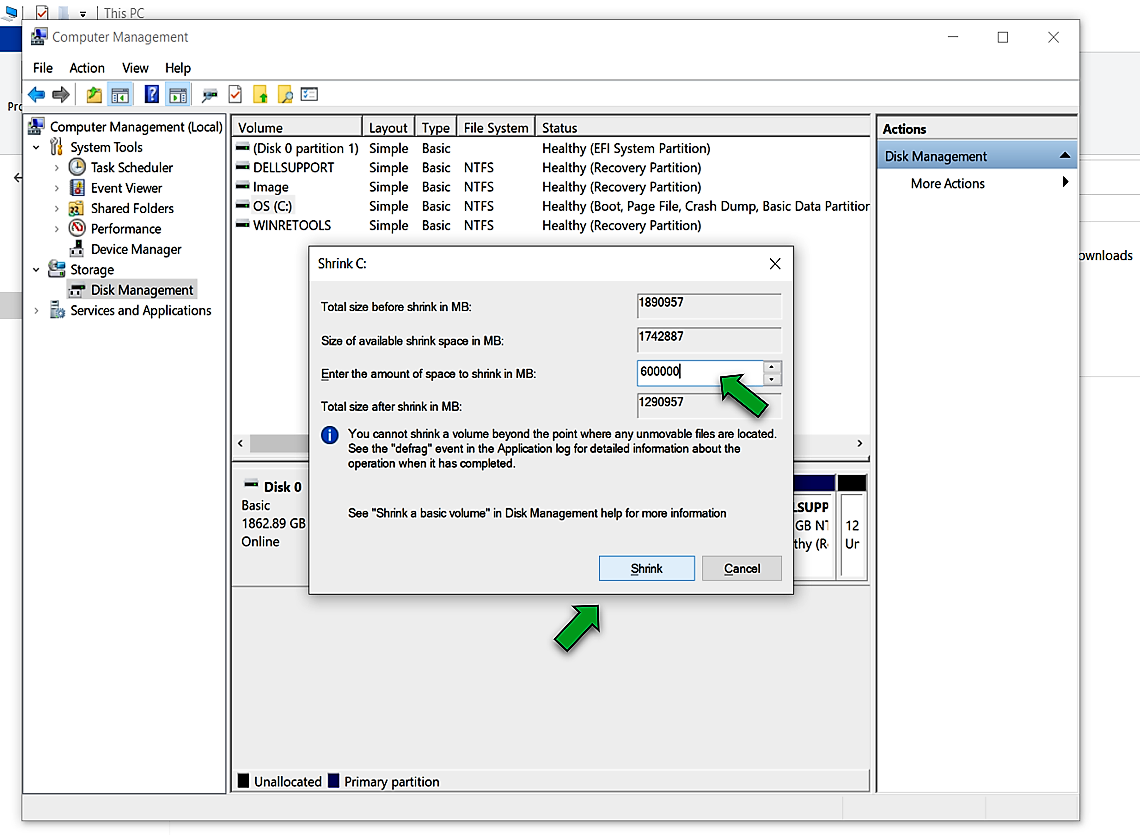
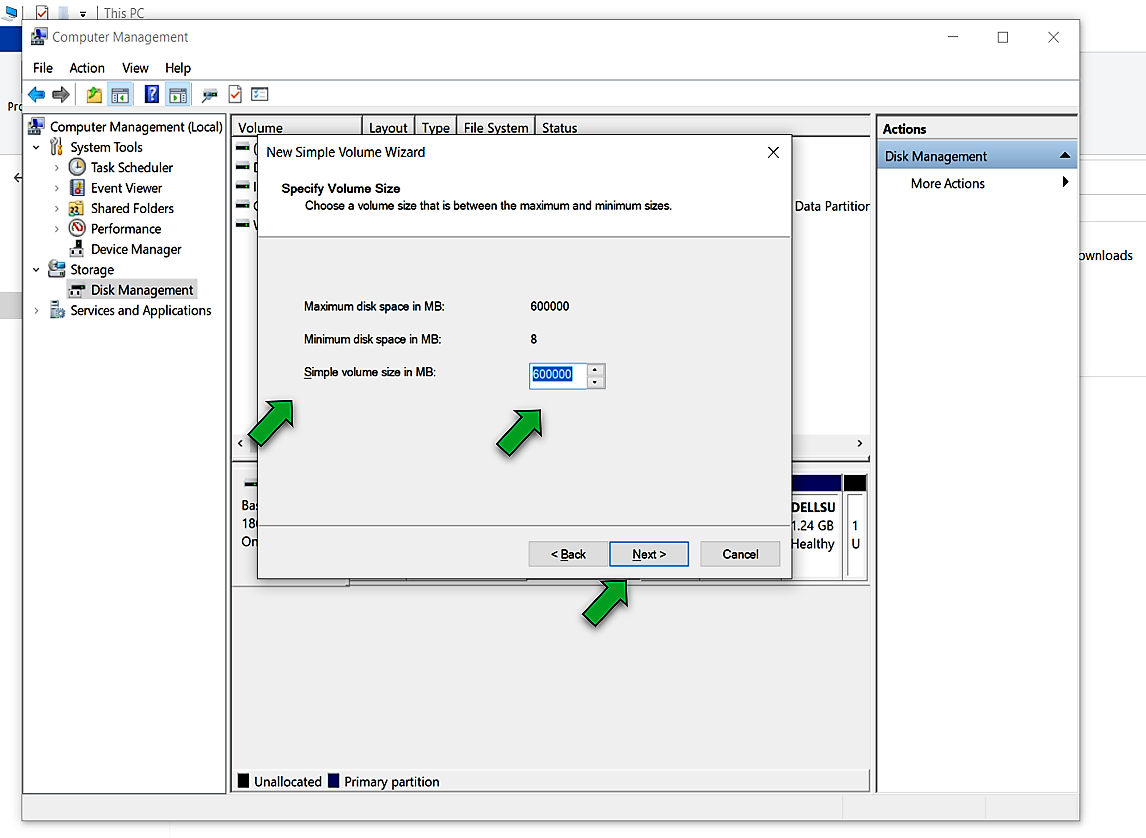
- Enter the Partition Data ( as per user requirement )
- Click on Shrink

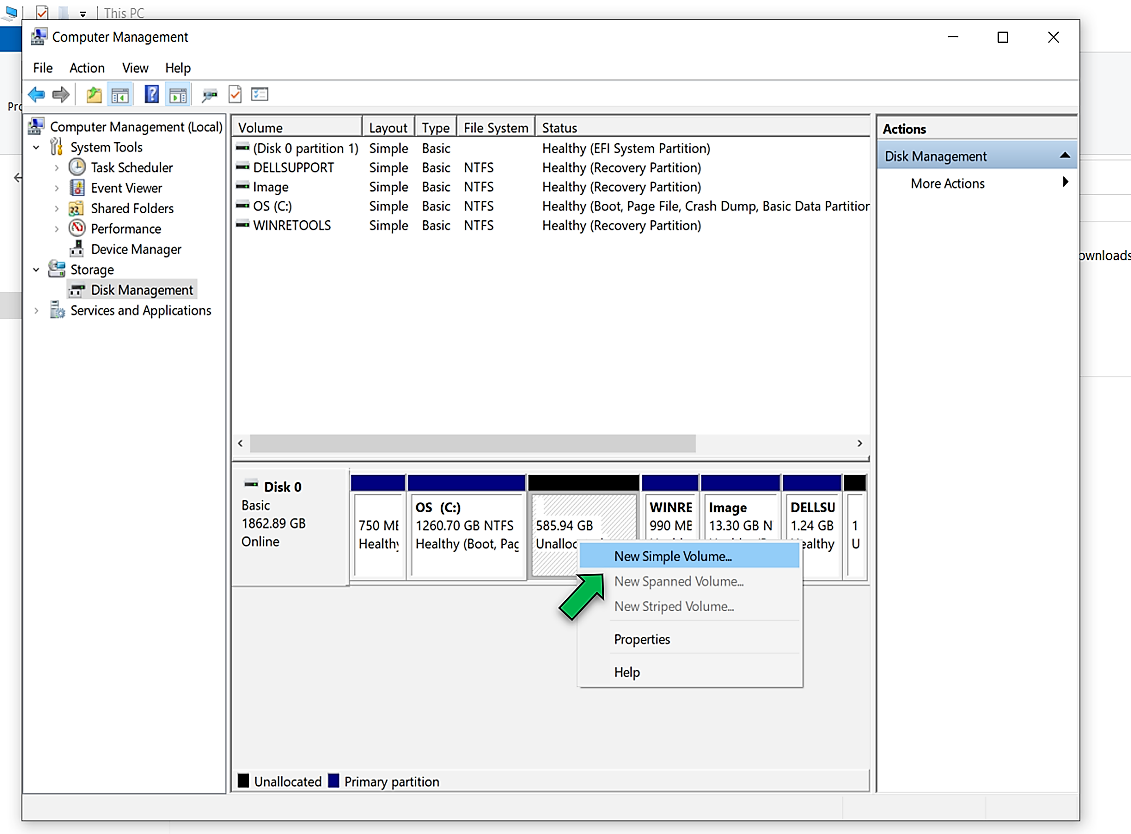
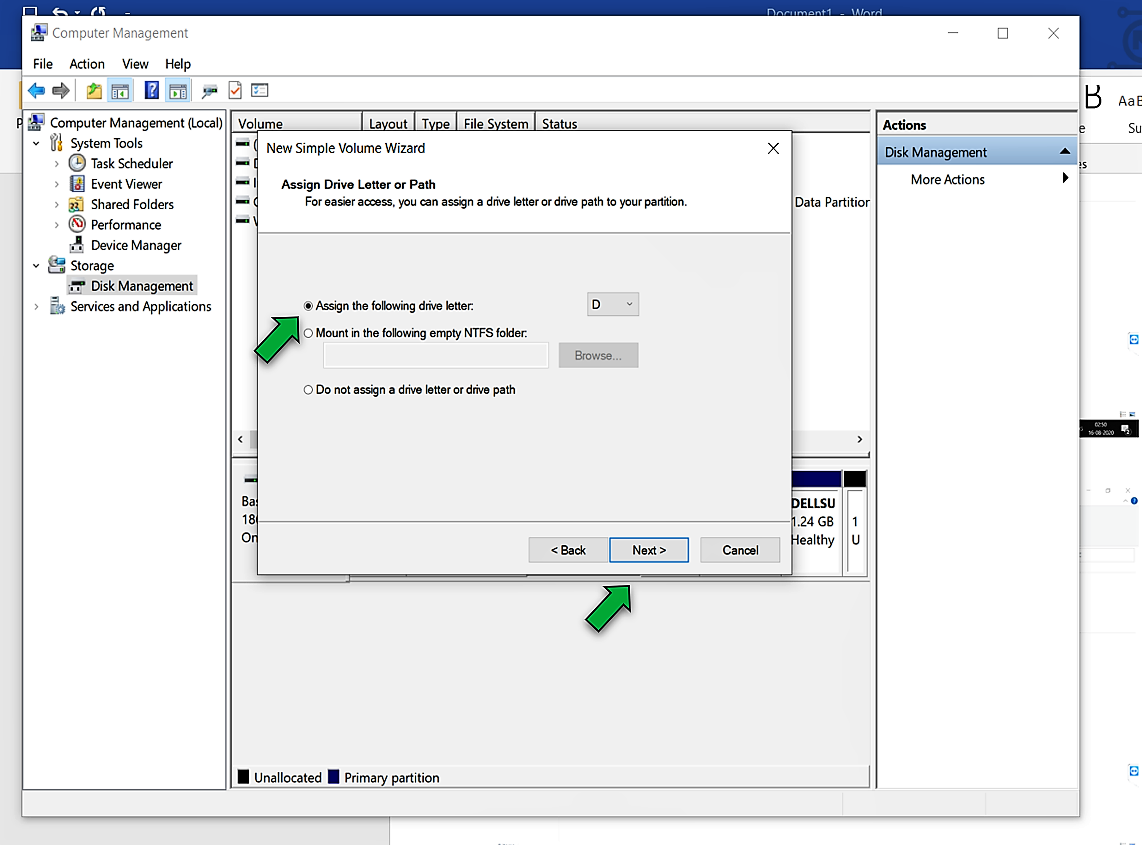
- New Simple Volume
- Right Click on the Shrick volume
- Select New Simple Volume
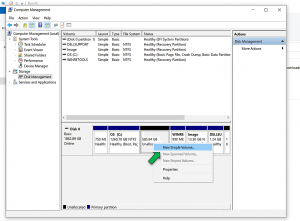
- Complete the Wizard
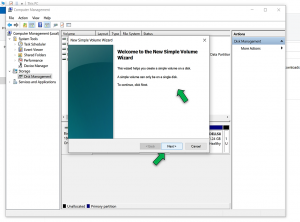
- Confirm the simple volume

- Assign Drive letter
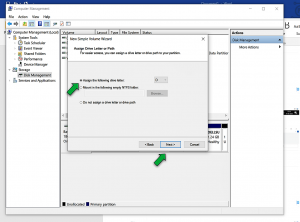
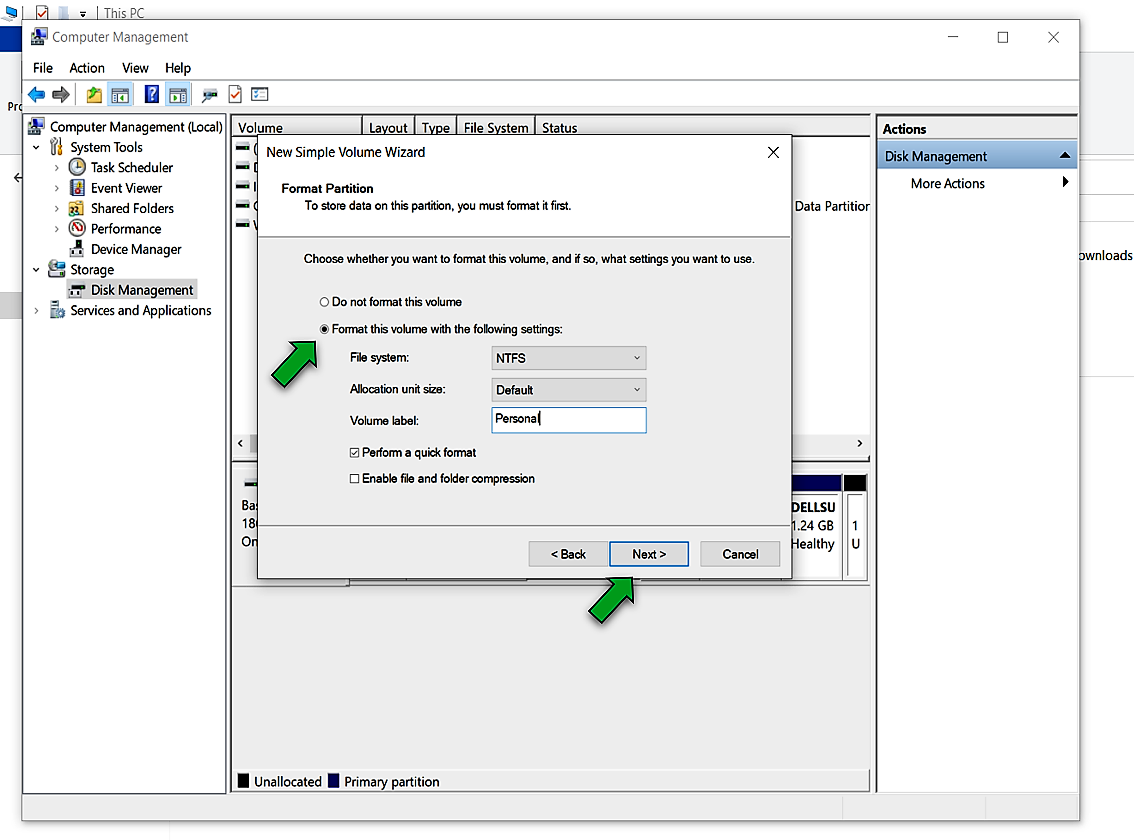
- Label the volume ( as per user requirement )

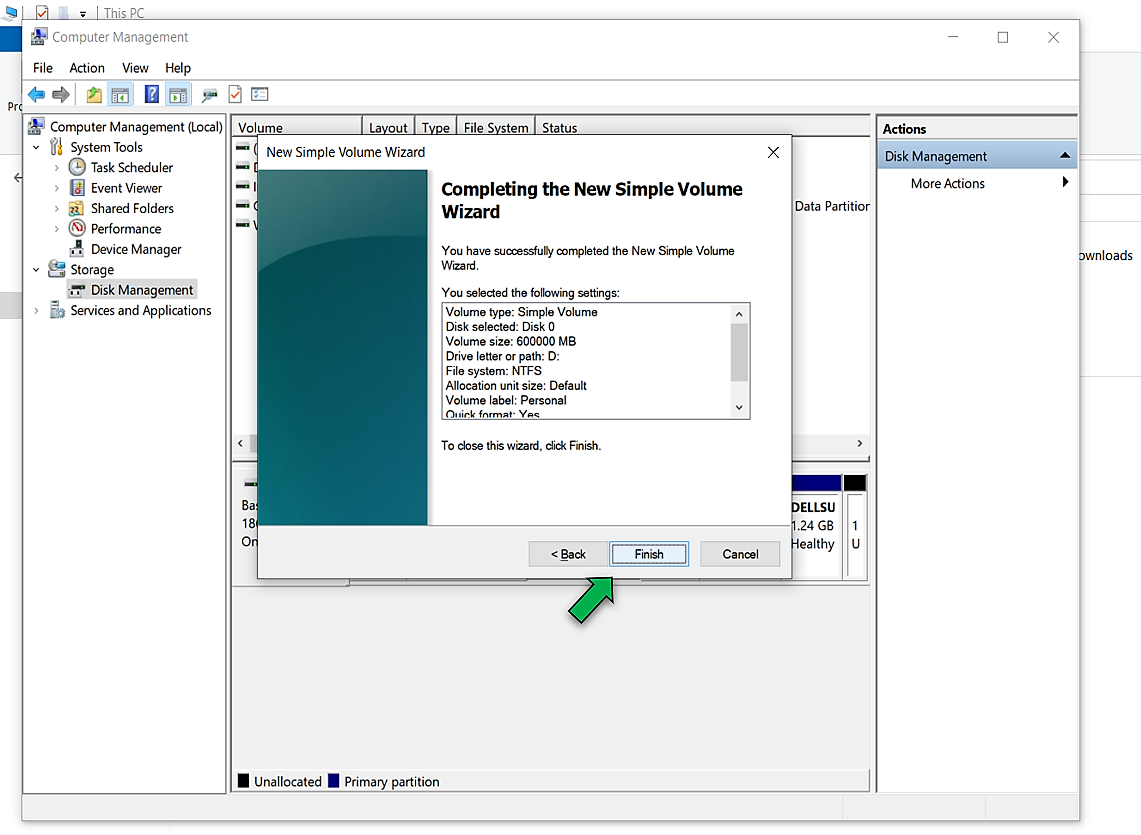
- Finally, click finish


( Repeat Process to create multiple Partition )
Last but not least once the Partitions are created in the disk management, check the storage that is assigned to each drive. You might notice some of the spaces from storage are missing. In the images above we selected 600GB but the actual storage we have access is 585GB. Windows do the Auto calculation part in the background while performing the partition process.
As you are completely done with your tutorial of how to create a partition. Let’s complete the final part of how to delete the particular disk from the disk management.
Step to Delete Partition
Access the Disk management window by following the steps mentioned above and follow the below-given step to finish with your tutorial.
- Firstly Select the disk you need to delete
- Secondly, Right-click on the disk
- Thirdly, select the option from the dropdown delete volume
- Finally, you will get a confirmation prompt window
- Click on yes ( If you don’t have any data stored or Backup your data and follow the steps)
(Refer to images)


Hope you find this tutorial helpful to organize your files, folder, personal and work-related data. In case you face any issues then do let us know in the comment section below. Also if you like our content then do share it with others and show your support. 
You can follow us on our Social Media profiles to get the quickest updates. Follow us – Instagram: /StopToExplore, Telegram: /StopToExplore, Facebook: /StopToExplore , Twitter: /StopToExplore, Youtube: /StopToExplore
0 Comments